About my baking challenge

I discovered the joy of baking for the first time ever in 2013, shortly after my dear mum passed away from cancer. During 2014 I tried to bring these two things together in a positive way , have fun and raise some money for Ashgate Hospice in Chesterfield where my mum passed away. Throughout the year I tried out new techniques and recipes from time to time ... and then sold some of my bakes for charity in my workplace. Since then I have continued to bake with some ups and downs .. and this blog charts my baking experiences, good and bad!

Saturday, 29 November 2014

Charity Cake Sale

I started the year with the intention of holding occasional sales of single cakes at work to give me the incentive to bake new things and raise money for my mum's charity at the same time. Things started well back in January, but from March onwards I got  embroiled in a very demanding project at work with long working hours, so thinks have kinda fallen by the wayside!

A few of my lovely colleagues had mentioned that they missed my cakes, so I decided to make up for lost time by having a proper cake sale  before the end of the year ... and this week was the ideal opportunity before everyone gets into the Christmas festivities and can't face any more eating :-) So I took two days' leave from work to bake, and held a pre-Christmas Cake cake sale across two floors in my office at Warrington Borough Council on Thursday.

Treats on offer included a mixture of previously baked cakes and new recipes, promoted as follows:

Santa's Tipple
(Chocolate Guinness Cake with Baileys cream cheese frosting)


Tropical Christmas
(Passionfruit and White Chocolate sponge)


Terry's Chocolate Orange Cake


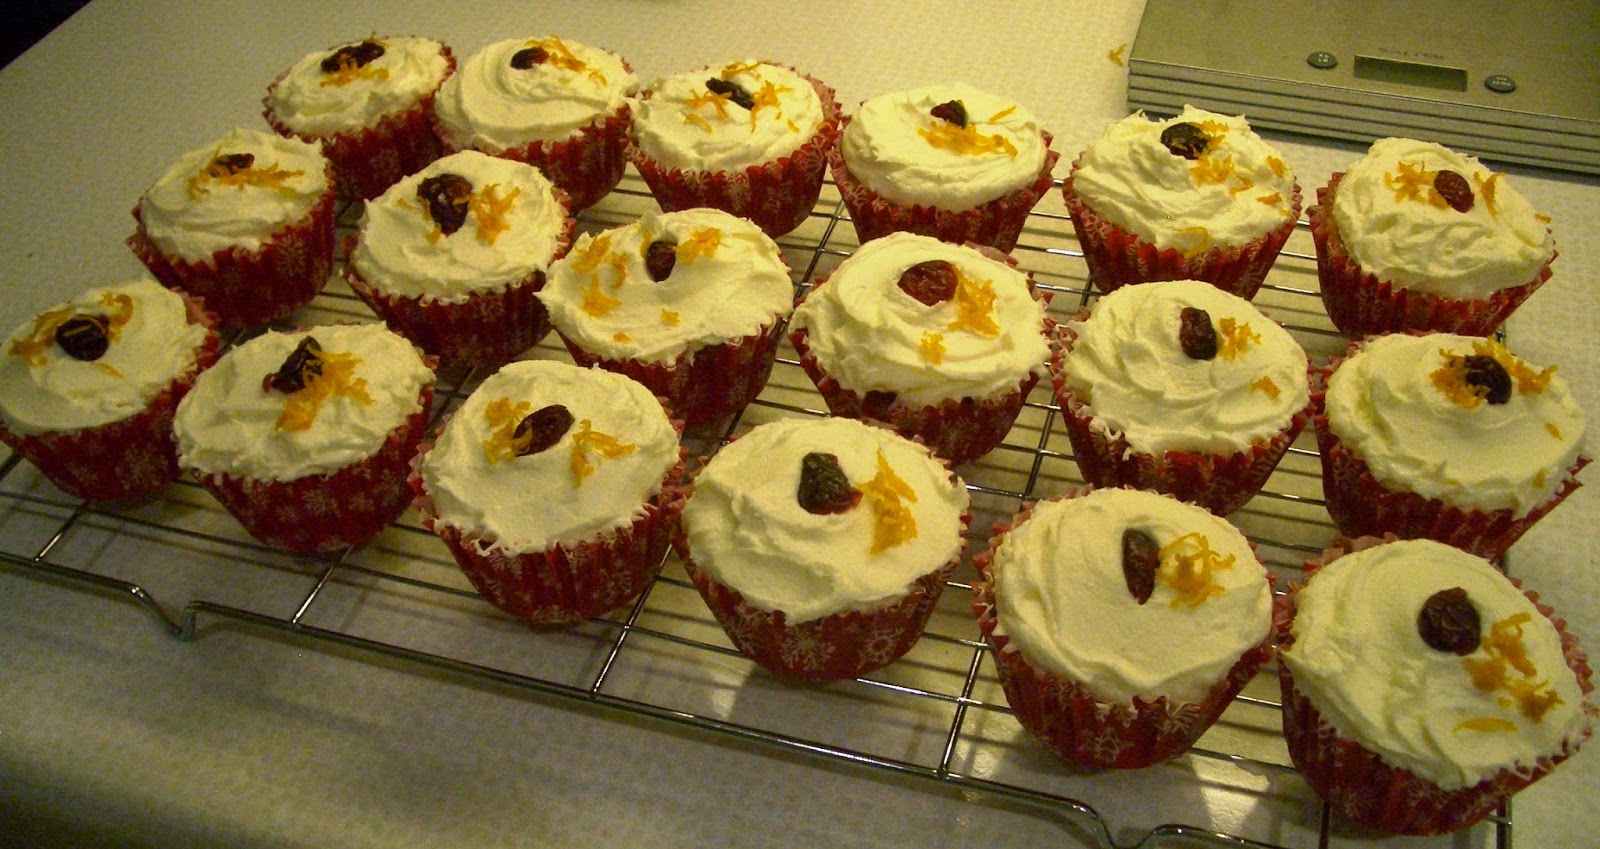
Cranberry and White Chocolate Cupcakes


Lemon Drizzle Traybake


Christmas Sparkle Cupcakes
(vanilla cupcakes with raspberry filling, pink vanilla buttercream and sparkle lustre)

Oops no picture!!

I sent an email around to my colleagues on several floors in the office, but I was a bit apprehensive as to whether the sale would be a success. I was absolutely amazed though ... I got stuck in traffic so only arrived to set up just before the advertised start time, and people were already waiting!! 

You may notice that there are no photos of the actual charity sale table, as my brilliant colleagues were so eager to sample the cakes that the table was surrounded straight away, and I never got chance to take any pics!! In fact I never even got a pic of my iced Guinness cake as I iced it from a chilled container immediately before putting on the table, and it was soon gone!

I could never have anticipated such success - everything was gone in just over an hour, raising a grand total of

£108.69

I rounded this up to £110 (+£27.50 gift aid) to give a grand total of

£137.50

So a big thanks to all my colleagues at Warrington Borough Council for making it such a success, and for the kind comments I received about the cakes - they seemed particularly to enjoy the Terry's chocolate orange cake!!

It was quite hard work, and I don't think I've ever done so much washing up in my life, but it was really worth it. My dad was really proud when I told him how much I had raised for the hospice where mum passed away, which made me feel all warm and fuzzy inside.

Back soon with one or two of the recipes ...

hugs,

Tuesday, 18 November 2014

Winter warmer - gingerbread & Guinness bundt with salted caramel drizzle


Hi everyone,
With the falling of the leaves and bonfire night upon us, my thoughts turned to warming winter cakes ... and I saw a fabulous recipe on Kat's  Baking Explorer blog for a "Bonfire Cake"  - gingerbread and Guinness bundt cake with salted caramel icing, loosely adapted from Chow.

I'd never made gingerbread cake or caramel icing before, nor indeed any recipe involving dark brown sugar and treacle ... so I felt inspired to give it a go and take it to work for my colleagues. I was a bit late for bonfire night, but took it into work a few days later .... only just got round to writing it up now! I kind of did a hybrid, with Kat's cake but with a more drizzly icing as per Chow.

Gingerbread & Guinness Bundt with Salted Caramel Drizzle Icing

Taken from The Baking Explorer and Chow

Ingredients:
For the cake:
255g plain flour
2 tsp baking powder
1/2 tsp bicarbonate of soda
2 tsp ground ginger
1 tsp cinammon
1/4 tsp nutmeg
1/2 tsp salt
165g dark brown sugar
170ml vegetable oil
3 large eggs, beaten
340g black treacle
250ml Guinness

For the salted caramel drizzle:
57g butter
165g dark brown sugar
175ml double cream
2t sp vanilla extract
1/2 tsp salt

Equipment:
Bundt tin - I used my Lakeland fluted cake ring tin.


Method:
1. Preheat the oven to 180°C/160°C fan/Gas mark 4.
2. Grease and flour your tin, or (as I did) brush with Cake Release.
3. In a large bowl, beat together the Guinness, treacle, dark brown sugar, vegetable oil and eggs.
4. Sift together the flour, baking powder, bicarbonate of soda, ginger, cinnamon, nutmeg and salt - add to the wet ingredients and beat together until combined (don't overmix).
5. Pour mixture into the prepared tin until level, and bake in pre-heated oven for 45 minutes or until a skewer inserted in the centre comes out clean.


7. Let the cake cool in the tin for 5-10 minutes then turn out onto a wire rack to cool completely.


8. Make the salted caramel by melting the butter in a pan, then add the sugar and cream - keep stirring and let the sauce bubble for about 5 minutes. Then add the vanilla extract and salt. Pour into a heatproof bowl (or even better a jug) to cool.


9. When the icing and cake are both cool, pour the icing over the cake so it drizzles down the sides.


Observations:
 This cake was very easy to make, made the house smell great, and looked good when it was done. The cake was also very soft and moist, and a beautiful colour. However I would have to be honest and say I found the flavour of it to be very strong and quite bitter due to the amount of treacle used, and some of my colleagues said the same... in fact my husband commented that whilst the cake had obviously turned out as it should, he didn't really like it. The biggest fans were those colleagues who are die hard gingerbread fans - clearly it's a matter of personal taste.

These reactions led me to do a bit of googling, and I found that this particular recipe was very heavy on the dark treacle compared to many ... never having used treacle in a recipe before I didn't really know what to expect!! However I didn't feel downhearted - the cake did turn out right in terms of the recipe, and it gave me a few learning points about how to use ingredients ... so next time I may try a gingerbread cake with a mixture of treacle and golden syrup, or perhaps light brown sugar ... here's to the next experiment!!

Challenges:
I would like to enter this effort into a few baking challenges, namely:

November's Teatime Treats hosted by The Hedge Combers and Lavender and Lovage - Bonfire Night

Lavender and Lovage Tea Time Treats

November's Love Cake challenge - In With A Bang!

Love Cake logo

November's Baking With Spirit at Cake of the Week - Warming


That's all for today - 'til next time.
Hugs,

Saturday, 18 October 2014

Pink champagne and strawberry salvage cake


The 3rd birthday party event for the Warrington CCC had a theme of cocktails and mocktails .... so I set  my brain to work to find a suitable recipe. My first port of call had to be the Clandestine Cake Club Cookbook - where else?? ... and I was soon tempted by the pink champagne anniversary cake.  I am a bit limited when attending an event as I have to go straight from work as i live some distance away; so I can't bake anything that requires all day refrigeration such as cream cheese frosting. Sadly this was one of the few cakes in the book without an accompanying photograph but I didn't let that put me off, and I was quite excited by the prospect of my bake.

What can I tell you?? This cake turned into the mother of all salvage jobs ... everything that could possibly go wrong did, and I don't really know why. In the end I also adapted the cake from the original recipe - partly due to time constraints, and also as I felt it would end up far too sweet. So here is my adaptation, with notes on the issues I encountered as a fairly inexperienced baker ....

Pink Champagne & Strawberry Cake

Based on recipe in the Clandestine Cake Club Cookbook

Recipe:
175g butter, softened
175g caster sugar
3 large eggs
250g self raising flour
Red food colouring
2-3 tbsp milk
Grated zest of 1 lemon

Champagne syrup:
85g granulated sugar
1/2 tsp vanilla extract
120ml pink champagne / cava

Champagne buttercream:
225g butter, softened
450g icing sugar
1/2 tsp vanilla extract
3-4 tbsp pink champagne/cava

Strawberry jam for filling

Equipment:
1 * 18cm (7") loose bottomed cake tin

Method:
1. Preheat the oven to 200C/180C fan/gas mark 6. Grease and line cake tin.
2. Beat the butter and sugar until light and fluffy.
3. Add the eggs one at a time, beating well after each addition, and add a tablespoon of flour with the final egg to help prevent curdling.
4. Stir in the red flood colouring to make the mixture a delicate shade of pink.
5. Sift in the remaining flour and fold gently to combine.
6. Stir in the milk until you reach dropping consistency, then add the lemon zest.
7. Spoon the mixture into the tin and spread evenly. Bake for about 40 minutes or until a skewer inserted in the middle comes out clean.
8. Leave in the tin for 10 minutes, then turn out onto a wire rack to cool completely.
9. Make the champagne soaking syrup - combine he sugar, vanilla and 175ml water in a small saucepan and heat gently until the sugar is dissolved. When the syrup is warm, stir in the pink champagne, then remove from the heat and set aside.
10. When the cake is cool, pour 100-150 ml of the champagne syrup over the cake and leave to soak for a couple of hours.
11. Make the champagne buttercream - beat the butter and icing sugar until very light and fluffy. Add the vanilla and champagne and mix until thoroughly incorporated.
12. To assemble the cake, cut into three layers (I used my wire cutter to ensure it was even). Spread one layer with jam and buttercream, then cover with the second cake layer. Repeat the  rpocess, then place the final cake layer on top.
13. Using a  palette knife, cover the top and sides of the cake with a thin layer of buttercream to form the "crumb coat".  Leave to chill in the fridge for about an hour, until firm and set. Then use the remaining buttercream to cover the top and sides again.


Observations:
Everything seemed to go to plan during the preparation of the sponge ... it was only when it got into the oven that things started to go a bit awry. It had struck me that the oven temperature was quite high .. but the cake rose massively and became very "domed"; and was rather burnt on the sides but not yet done in the middle (Could this be due to only greasing the sides of the tin rather than lining with baking parchment??).

When the cake was eventually cooked through (I did turn the oven down a bit to calm the process down), after letting it cool a little I cut off the burnt sides with a sharp knife - this was the beginning of my next set of problems as it left the cake a tad unstable and crumbly.

I have never soaked a cake in syrup before; and after I had made the champagne syrup I was rather wary seeing how liquid it was - surely it would make the whole cake soggy?? Thus I poured over a bit less than the recipe suggested; but my main problem came with the fact that I only had enough time to let it soak for barely 2 hours .... when I came to cut the cake to fill it, it started to REALLY crumble!!! I had already decided to forgo the white chocolate ganache in the original recipe and replace it with some nice sticky strawberry jam (champagne and strawberries ....) but decided it would have the added advantage of helping to really stick the cake together!  Even so, by the time I had added my "crumb coat" of  buttercream the whole thing looked a shambles!! At this point I was seriously considering not attending the CCC event at all!!

However it is surprising how it can be patched up when it has firmed up in the fridge for an hour ... at this point I was able to fill all the gaps and cover it reasonably successfully. My problems still weren't quite over though ... due to the crumbliness I had to make a little extra  buttercream to plug a couple of holes .. and it turned out a slightly different shade to the rest!! ... so then I had to eke it out VERY THINLY to cover the whole cake!!

In the end, although the finished look could hardly be described as professional, it didn't look too bad .... I felt able to actually take it along to the CCC birthday event.


I was still of the opinion that it would fall to bits when sliced .. but surprisingly it held together reasonable well, and it tasted really delicious. I took the leftovers to work the next day and my colleagues wolfed them down, so something must have gone right!!


So I guess the lesson there is never give up on a cake wreck - salvage is always possible!!

I would like to enter this for this week's Bake of The Week hosted by Casa Costello

Casa Costello

and #CookBlogShare hosted by Lucy at Supergoldenbakes

“#CookBlogShare

Hugs,

Sunday, 5 October 2014

CCC Warrington 3rd Birthday - Cocktails & Mocktails


The Warrington branch of the Clandestine Cake Club held its third birthday party on Tuesday 30th September, with a theme of Cocktails and Mocktails.

The event was organised by our lovely leader Helen Rimmer, and was held at the fabulous Dingle Farm in Appleton - a wonderful olde worlde tea room, artists' studio and farm shop. The ladies there looked after us all brilliantly, serving drinks in the most gorgeous vintage china, which really set the tone for the occasion.

It is only the second time I have attended a meeting of the CCC but I was really looking forward to it; as I was sure everyone would push the boat out and make a real effort for the club's third birthday .... and I certainly wasn't disappointed!! There were somewhere in the region of 15 stunning cakes of every description spread over 2 tables - it was difficult to keep track of exactly how many and what was what, as more seemed to keep appearing (and in the whirl of admiration and cake cutting some of the labels went awry!!), but they included

  • 3 strawberry daquiri cakes
  • Amaretto bundt
  • Banana daquiri cake
  • Pimms layer cake
  • Irish Coffee Liqueur cake
  • B52 cake
  • Chocolate, almond & rum cake
  • Pink champagne and strawberry cake
  • Pina Colada cake
  • Chocolate whiskey cake
  • Fruit cooler cake

(sorry for any I have missed!!)

All I can say is wow what a selection!! Everyone seemed to have a great time tucking into samples and chatting whilst sipping their tea from vintage china ... I took along a friend as a guest and she also really enjoyed it.  It's  just a pity there were just tooo many to sample them all!!

(most of the following pictures taken by Helen Rimmer for the CCC  blog, as I took loads of my own but due to low light conditions they didn't come out!)

DSC_0004


DSC_0009


DSC_0023


DSC_0006


Thanks to Helen and to the Dingle Farm ladies plus all the bakers for such a wonderful evening.
Hugs,

Saturday, 27 September 2014

TGI Friday Bake - Orange Madeira Cake

Last weekend I came home from a lovely 11 day holiday in Cyprus taken with my dear husband to celebrate our 30th wedding anniversary. By Tuesday I had a mile-high pile of ironing to tackle, and was also back into the hurly-burly of work ... so it has seemed like a loooooong week!!  We have also had a couple of new team members start in the office while I was away, so I thought I would give us all a TGI Friday boost by baking  a cake for our Friday team meeting :-)

Whilst recently browsing some of my favourite  baking blogs I came across a tempting recipe for orange madeira cake over at The Caked Crusader ... I've never made a madeira cake before, but it looked pretty easy so even after a tiring day at work I felt inspired to try it.


Orange Madeira Cake

 Taken from: The Caked Crusader blog post.

Ingredients:
175g unsalted butter, softened
175g golden caster sugar
3 eggs
200g self raising flour
grated zest of 1 orange
50g ground almonds

For the icing:
100g icing sugar
freshly squeezed orange juice - enough to mix to form icing (approx 2-3 tbsps)

Equipment: 
1 * 900g (2lb) loaf tin, greased and lined with baking case

Method:
1. Pre-heat oven to 170°C/150°C (fan)/Gas Mark 3.
2. beat together the butter and sugar until pale and creamy.
3. Beat in the eggs one at a time, adding a little flour if it looks like mix might curdle.
4. Fold in the flour, orange zest and ground almonds.
5. Spoon into prepared tin and level the serfuce.
6. Bake for approx. 55 minutes or until a skewer inserted into the middle comes out clean.
7. leave to coll in the tin for approx. 15 minutes, then turn out and leave to cool completely on a wire rack.
8. When cool, make the icing by beating together the icing sugar and orange juice. Add the juice slowly so the icing doesn't become too runny.
9. Spread icing over the cake.


Observations:
This really was easy, smelled lovely and was well received by my workmates. My only possible error was that being very inexperienced in making icing,I  initially added a bit too much juice ... it's amazing how much icing sugar a small amount of juice can absorb!! This just meant that after it had dribbled messily down the sides I did have to move the cake from plate A to plate B for presentation .. but what's a little extra washing up?? Overall very pleased with my first madeira cake and I'm sure i will make either this or a lemon version again in future.

I would like to enter this attempt into  Love Cake - September - Back to School (Something New)

Love Cake logo

That's all for today - enjoy your weekend.
Hugs,

Tuesday, 26 August 2014

Ombre Cake


Hi everyone,
I haven't been feeling too inspired in the baking department recently .. probably down to lack of time ...  but last Saturday my good friend Christine had her 40th birthday so I thought I should take this golden opportunity to branch out and try something different ... preferably with a bit of  a "wow factor"!

I had seen various blog posts about "rainbow cakes" and liked the idea in one sense, though in another the thought of eating such vibrantly coloured sponge made me feel a little apprehensive ... so I decided to compromise by trying a pastel ombre cake.

I wanted multiple layers, so I decided to purchase and have a go with Wilton's Easy Layer Cake Pans, from Lakeland.


The set will make a 5 layer 6 inch cake. It also has a recipe leaflet which included a rainbow cake; but as this was an egg-white cake (which I've never made before) I decided to play safe and use a Victoria sandwich cake mix instead, so I used a 4-egg mix based on the number of eggs used in the set's recipe leaflet.  I also decided to go for a buttercream icing rather than my first choice of cream cheese frosting, on the basis that this would be less problematic for transportation if the birthday girl wanted to go round visiting friends and relatives :-)

Ombre Cake

Ingredients:
For the cake:
4 eggs (weighed) - mine weighed 236 g
Same weight as eggs for each of self raising flour, caster sugar and butter (softened)
1 tsp vanilla extract
Up to 40ml milk
Food colour pastes (I used Sugarflair pastel pink and lilac)

For the icing:
500g icing sugar
250g butter (softened)
1 tsp vanilla extract
Edible decorations (eg. hundreds and thousands) to finish.

Equipment:
1 * Wilton Easy Layers Cake Pan set, or 5 individual 6" sandwich tins.

Method:
1. Preheat the oven to 180 C/160 C(fan)/gas mark 4. Prepare the cake tins by greasing and possibly lining the bases with baking parchment.

2. Beat together the butter and sugar in a large bowl until very pale and fluffy.


3. Add the beaten eggs to the mixture a little at a time, beating well to combine. Add the vanilla extract, then gently fold in the flour (do not overbeat or the cake will be tough). Add the milk a little at a time and combine gently until the mixture reaches "dropping" consistency. 


4. Divide the mixture evenly into 5 bowls, and add the food colouring to achieve the shades you desire. Spoon mixture into baking tins and smooth the tops. Bake in the preheated oven until firm and springy to the touch, and a toothpick comes out clean (approx 12-13 minutes).


5. Cool cakes in tins for approx 5 minutes then turn out onto a cooling rack and allow to cool completely. 

6. Meanwhile, make the buttercream icing by beating the butter until very pale, light and fluffy, then adding the icing sugar in stages and beating well. Add the vanilla extract and beat well.

7. Before assembling the cake, cut off any browned edges if necessary to reveal colour of sponge. Place a small swirl of buttercream on serving plate or  board and then place darkest coloured sponge on top. Spread thinly with buttercream then place the next sponge on top, and repeat until all 5 sponges are neatly stacked.


8. Using a large offset palette knife, spread a thin layer of buttercream all over the sides and top of the assembled cake to form a "crumb coat". Chill in the fridge for an hour.


9. Spread the rest of the buttercream over the top and sides of the cake to completely cover, and swirl with a large palette knife. This is best achieved using an icing turntable. 


10. Sprinkle with edible decorations (I used pastel confetti dots) to finish.


Observations:
I thought that the Wilton cake pan set was a really good idea; but having tried it I'm not so sure. The sides of the tins aren't very straight which made it difficult to line even the base; and the sides of the cake did burn a bit. The recipe leaflet in the pack was not very helpful as the recipes in English all used American cup measurements, so I had to find a French or Spanish equivalent and do my best to work out the equivalent grams! :-(    In the end I didn't actually use a recipe from the leaflet; thought their suggested cooking times of approx 17-20 minutes were WAY over the top ... I looked after 12 minutes and could already see some browning!

Essentially this cake was very easy to make if somewhat fiddly, and it's fair to say it generated more washing up than anything I've ever baked before!! The most difficult bit was stirring in the food colouring ... I had read that I must definitely use gel or paste to get a good and consistent colour, but I found it extremely difficult to distribute evenly and was rather worried that I was beating all the air out of the batter!  On reflection I also didn't get much of a colour difference between layers 4 and 5, even though the batters looked a bit different in the pans before going in the oven. 

I tried using an old icing turntable inherited from somewhere but it wasn't very successful as it couldn't really take the weight of the cake ... so a new one is now near the top of my baking wish list!

I did get to try a slice of this cake as Christine very kindly saved some for me, my husband and my dad :-), and if I'm totally honest I would say it was a bit more dense than I would have ideally liked ... but not so much so as to make it a failure and it certainly did look very pretty and have the wow factor!! Overall  I was pleased with this as a first attempt, and my friend did make some very kind comments about my efforts :-)

I'd like to enter this into this week's Bake of the Week hosted by Linzi, whilst Helen at Casa Costello is on holiday.

Casa Costello

Also I would like to enter my effort for this week's #CookBlogShare hosted by Lucy at Supergoldenbakes


That's all for today ... 
Hugs,